

安装 Cosmos Ledger 应用
在使用 Keplr 或gaiad 之前,你必须先在 Ledger 设备上安装 Cosmos 应用。操作步骤如下:
- 在你的电脑上安装 Ledger Live。
- 使用 Ledger Live,将你的 Ledger Nano S 固件更新到最新版本。
- 在 Ledger Live 应用中,进入
Manager菜单。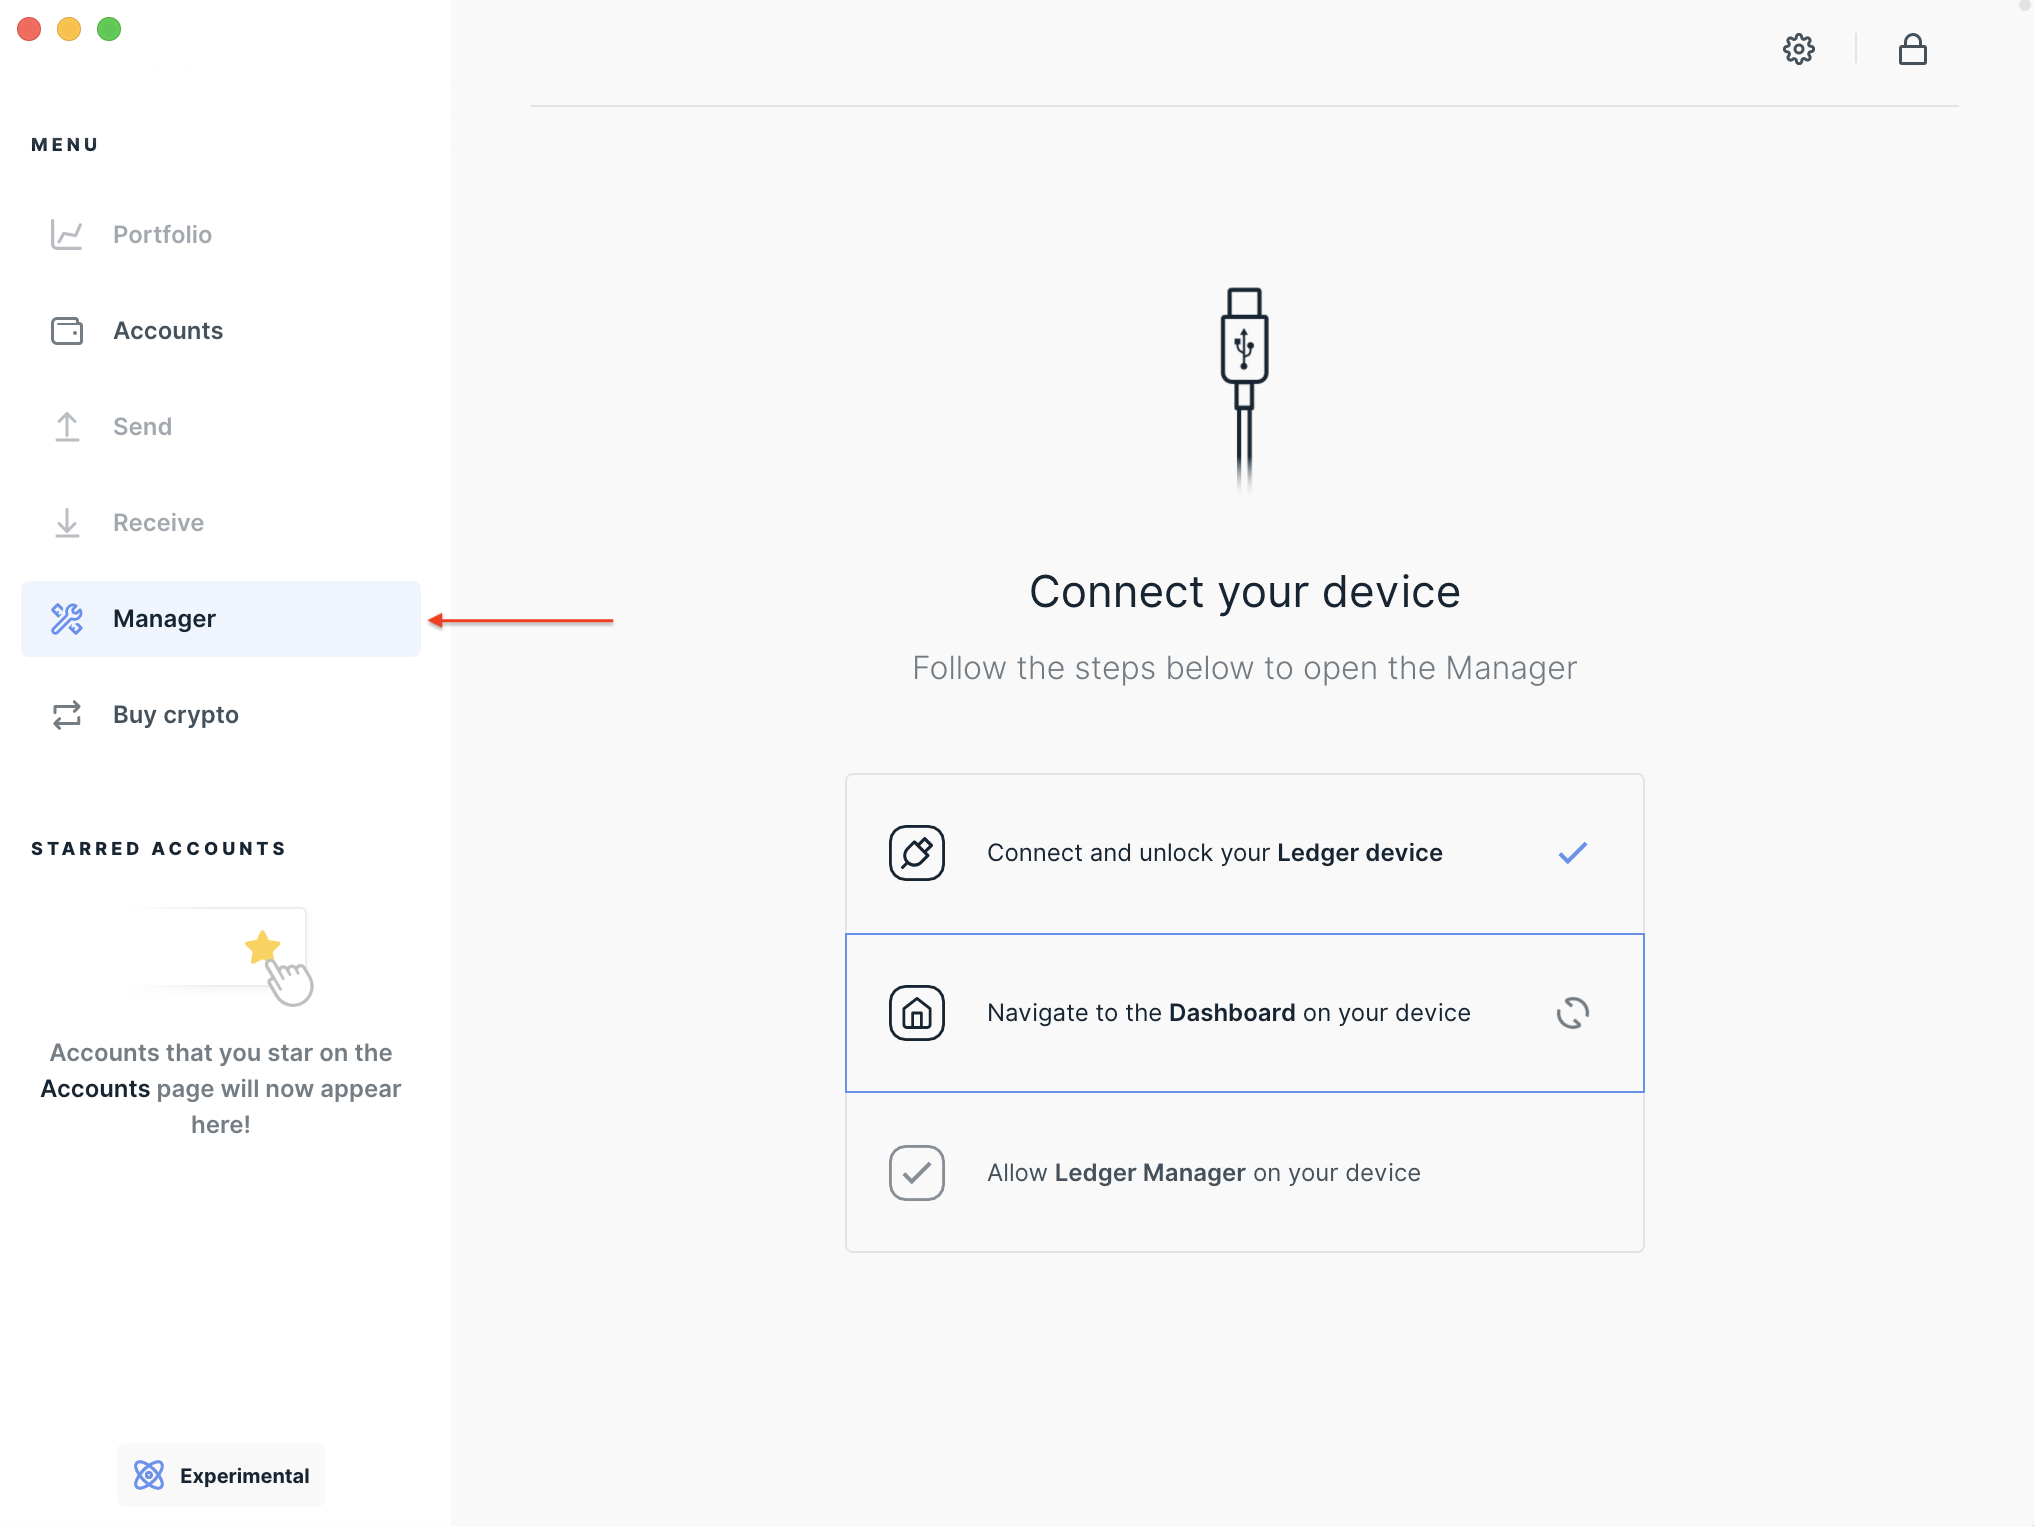
- 连接你的 Ledger Nano 设备,并在设备上允许 Ledger Manager 访问。
- 在 Ledger Live 应用中搜索
Cosmos。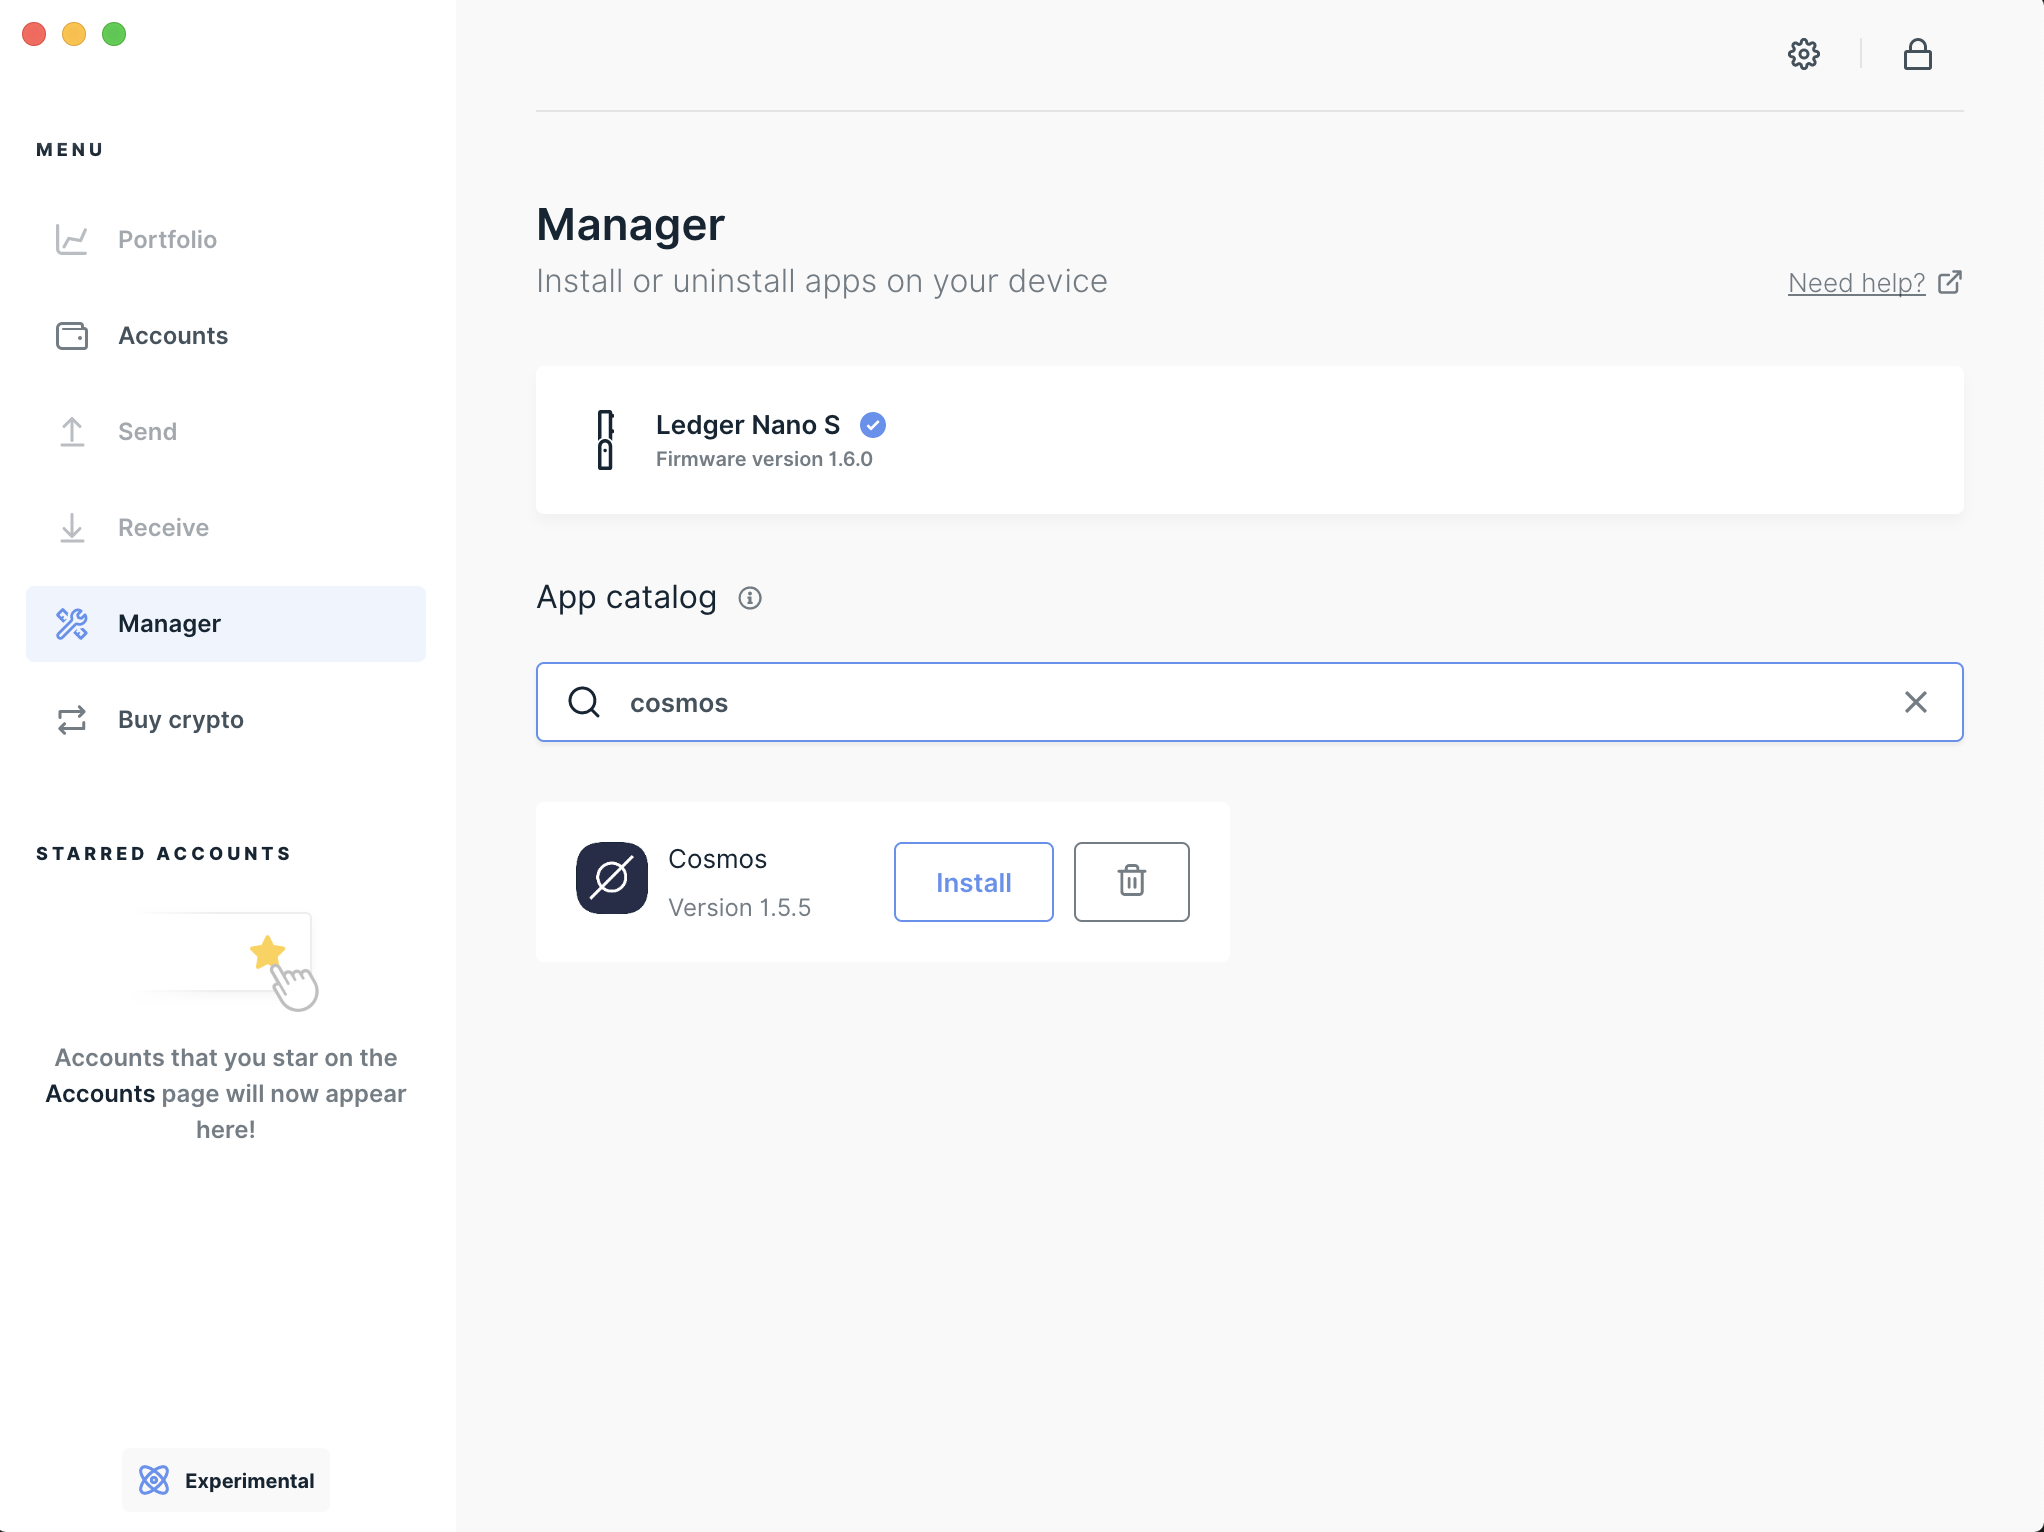
- 点击
Install安装 Cosmos 应用。
Keplr + Ledger Nano
注意:在阅读本节之前,你需要先在 Ledger Nano 上安装 Cosmos 应用- 将 Ledger 设备连接到电脑,使用 PIN 解锁,并打开 Cosmos 应用。
- 安装 Keplr 浏览器扩展。
- 点击 Keplr 扩展图标,选择
Import Ledger,然后设置账户名称和密码。 - 确保 Ledger 设备已解锁且已打开 Cosmos 应用,然后按照 Keplr 弹窗中的说明继续操作。
(可选)确认你的地址
你可以直接在 Ledger Nano 设备上再次确认 Keplr 显示的地址是否正确。操作如下:- 将 Ledger 连接到电脑,并在设备上打开 Cosmos 应用。
- 打开 Cosmos 应用后,点击右侧按钮进入
Show Address选项。 - 同时按下两个按钮,然后选择
Account 0和Index 0。
Gaia CLI + Ledger Nano
注意:在阅读本节之前,你需要先在 Ledger Nano 上安装 Cosmos 应用 在 Cosmos Hub 网络中,用于生成地址和交易的工具是gaiad。以下是入门方法。如果你不熟悉 CLI 工具,请下滑并改为按照 Keplr 钱包的说明操作。
开始之前
使用以下命令验证 gaiad 是否已正确安装添加你的 Ledger 密钥
- 连接并解锁你的 Ledger 设备。
- 在 Ledger 上打开 Cosmos 应用。
- 在 gaiad 中基于 Ledger 密钥创建账户。
>= 0 的值,以选择 HD 派生使用的账户):
确认你的地址
运行以下命令以在设备上显示你的地址。请使用你为 Ledger 密钥设置的keyName。-d 标志在 1.5.0 及更高版本中受支持。
连接到全节点
接下来,你需要为 gaiad 配置一个 Cosmos 全节点的 URL,以及对应的chain_id。在本例中,我们连接到 Chorus One 在 cosmoshub-2 链上运营的公共负载均衡全节点。但你也可以将 gaiad 指向任何 Cosmos 全节点。请确保 chain-id 与该全节点所在链保持一致。
签署交易
现在你已经可以开始签名并发送交易了。使用tx send 命令通过 gaiad 发送交易。
keyName,gaia 将连接到 Cosmos Ledger 应用并对交易进行签名。
confirm transaction before signing 提示时,输入 Y。
接下来,系统会提示你在 Ledger 设备上检查并批准这笔交易。请务必检查屏幕上显示的交易 JSON。你可以逐项滚动查看每个字段和每条消息。继续向下阅读可以了解标准交易对象中的各个数据字段含义。
现在,你已经可以开始在网络上发送交易了。
接收资金
如果你希望资金转入 Ledger 设备上的 Cosmos 账户,可以使用以下命令获取 Ledger 账户地址(即TYPE ledger 的那些账户):
更多文档
不确定gaiad 能做什么?直接运行不带参数的命令,即可输出其支持命令的说明文档。
Cosmos 标准交易
Cosmos 中的交易会嵌入 Cosmos SDK 的标准交易类型。Ledger 设备会在签名前显示该对象的序列化 JSON 表示,供你检查。以下是各字段及其含义:chain-id:你要广播该交易的链,例如gaia-13003测试网,或cosmoshub-2:主网。account_number:发送账户的全局 ID,在该账户第一次收到资金时分配。sequence:该账户的 nonce,每发送一笔交易递增一次。fee:描述交易手续费的 JSON 对象,包括 gas 数量和币种面额。memo:可选文本字段,可用于以多种方式标记交易。msgs_<index>/<field>:交易中包含的消息数组。双击可继续查看 JSON 中嵌套字段的详细内容。
支持
如需进一步支持,建议先查看我们论坛中的相关帖子。 也欢迎在我们的 Telegram 频道 中联系并寻求帮助。 以下是来自优秀 Cosmos 社区的一些相关且实用的教程:Using a hardware wallet to store your keys greatly improves the security of your crypto assets. The Ledger device acts as an enclave of the seed and private keys, and the process of signing transactions takes place within it. No private information ever leaves the Ledger device. The following is a short tutorial on using the Cosmos Ledger app with the Gaia CLI or the Keplr wallet extension. At the core of a Ledger device there is a mnemonic seed phrase that is used to generate private keys. This phrase is generated when you initialize your Ledger. The mnemonic is compatible with Cosmos and can be used to seed new accounts.
Install the Cosmos Ledger application
Installing theCosmos application on your ledger device is required before you can use either Keplr or gaiad. To do so, you need to:
- Install Ledger Live on your machine.
- Using Ledger Live, update your Ledger Nano S with the latest firmware.
- On the Ledger Live application, navigate to the
Managermenu. - Connect your Ledger Nano device and allow Ledger Manager from it.
- On the Ledger Live application, search for
Cosmos. - Install the Cosmos application by clicking on
Install.
Keplr + Ledger Nano
Note: You need to install the Cosmos app on your Ledger Nano before following this section- Connect your Ledger device to your computer, unlock it with the PIN and open the Cosmos app.
- Install the Keplr browser extension.
- Click on the Keplr extension icon and select
Import Ledgerand choose an account name and password. - Make sure your Ledger device is unlocked and has the Cosmos app open and then follow the instructions on the Keplr pop-up.
(Optional) Confirm your address
You can double check that Keplr is displaying the correct address directly on your Ledger Nano device. To do so:- Connect your Ledger to your computer and open the Cosmos application on the device.
- Once the Cosmos app is open, click on the right button to access the
Show Addressoption. - Click on both button, then select
Account 0andIndex 0.
Gaia CLI + Ledger Nano
Note: You need to install the Cosmos app on your Ledger Nano before following this section The tool used to generate addresses and transactions on the Cosmos Hub network isgaiad. Here is how to get started. If using a CLI tool is unfamiliar to you, scroll down and follow instructions for using the Keplr wallet instead.
Before you Begin
Verify that gaiad is installed correctly with the following commandAdd your Ledger key
- Connect and unlock your Ledger device.
- Open the Cosmos app on your Ledger.
- Create an account in gaiad from your ledger key.
>= 0 to choose the account for HD derivation):
Confirm your address
Run this command to display your address on the device. Use thekeyName you gave your ledger key. The -d flag is supported in version 1.5.0 and higher.
Connect to a full node
Next, you need to configure gaiad with the URL of a Cosmos full node and the appropriatechain_id. In this example we connect to the public load balanced full node operated by Chorus One on the cosmoshub-2 chain. But you can point your gaiad to any Cosmos full node. Be sure that the chain-id is set to the same chain as the full node.
Sign a transaction
You are now ready to start signing and sending transactions. Send a transaction with gaiad using thetx send command.
keyName you set for your Ledger key and gaia will connect with the Cosmos Ledger app to then sign your transaction.
confirm transaction before signing, Answer Y.
Next you will be prompted to review and approve the transaction on your Ledger device. Be sure to inspect the transaction JSON displayed on the screen. You can scroll through each field and each message. Scroll down to read more about the data fields of a standard transaction object.
Now, you are all set to start sending transactions on the network.
Receive funds
To receive funds to the Cosmos account on your Ledger device, retrieve the address for your Ledger account (the ones withTYPE ledger) with this command:
Further documentation
Not sure whatgaiad can do? Simply run the command without arguments to output documentation for the commands in supports.
The Cosmos Standard Transaction
Transactions in Cosmos embed the Standard Transaction type from the Cosmos SDK. The Ledger device displays a serialized JSON representation of this object for you to review before signing the transaction. Here are the fields and what they mean:chain-id: The chain to which you are broadcasting the tx, such as thegaia-13003testnet orcosmoshub-2: mainnet.account_number: The global id of the sending account assigned when the account receives funds for the first time.sequence: The nonce for this account, incremented with each transaction.fee: JSON object describing the transaction fee, its gas amount and coin denominationmemo: optional text field used in various ways to tag transactions.msgs_<index>/<field>: The array of messages included in the transaction. Double click to drill down into nested fields of the JSON.